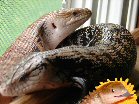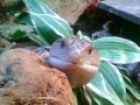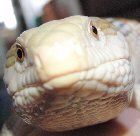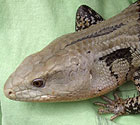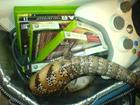

 All the lizards are already asleep, so they'll have to wait until tomorrow to try some out. When they do though, I'll be sure to post pictures of that here as well. As of now however, this will just be about the roaches and setting it all up.
I ordered 4 species of roaches, 100 count each (plus 35 extra for Sheslikeheroin). What I got and how I feel about them:
100+30 Madagascar Hissing Roaches (Gromphadorhina portentosa) - Hmm, I'm reserving judgement on these guys until they get bigger. The small ones just give me the heeby-jeebies. They do seem quite calm though.


100 Turkistan Roaches (Blatta lateralis) - These are the creepers. They're small and they move fast. I'd barely opened the lid and they were everywhere.*shudder* They also had 5 deaths during shipping, worse than the others.


100 Discoid Roaches (Blaberus discoidales) - These guys are pretty neat. They look like a bigger version of a pill bug/rollie-polly/sand beetle. We got a white one that managed to step onto a piece of duct tape. We liked it until we found out it wasn't albino, just in molt. 2 died during shipping.


100+5 Orange Spot Roaches (Blaptica dubia) - My favorite so far. They look like the Discoids, but they seem calmer. I even held one of these for a bit, so I like them. They also seem to enjoy burrowing into the food while eating.


So now onto my setup. For each bin I used:
-1 29g rubbermaid plastic bin
-14in x 14in (varies) hardware cloth, 1/4in or smaller
-2 plastic plates
-4 cardboard egg flats
-Lamp & bulb (heat)
-Exacto-knife, wire cutters & scissors
-Masking tape and duct tape
-Hot glue gun
-Marker
-High protein kitten food, carrots (fruits/veggies) & water gel
Photo Time! There's a lot of pictures (step-by-step), so I'm making them smaller.
1) Starting with a 29g/109.8L rubbermaid, I trace a 12in by 12in square on the lid. I used an exacto-knife to the plastic. This bin was cheap and really easy to cut. I actually would cut 3 sides, score the 4th, and it would simply snap off.


2) I turned the lid over now so the mesh will be inside. I used 1/4in hardware cloth for my bins, but 1/8in would be even better. I cut pieces of cloth to cover the inside of the hole with a 1 inch overlap all around. I then used masking tape to tape off the sharp edges. BTW, isn't #4 an awesome shot


3) I now used my hot glue gun to glue the mesh to the inside of the lid. The glue is great for holding the mesh to the lid. We did one bin of an entire outline of glue (1-3), but just placing dots of glue (4) works as well. Make sure the glue goes through the holes and connects to the lid. I found this to be quite strong.


4) I now duct taped the mesh to the inside of the lid. This went over the glue as added strength, and later gets coated in vasoline as an added precaution.


5) I ran out of duct tape and the store was closed so I had to wait until the next day to finish. This is the result for day 1.

6) Today I again got down to work on my bins. First off I smeared a large (min 3in) ring of vasoline around the inside of each bin near the top. This prevents climbing for those that can (hissers). I also smeared more vasoline on and around the duct tape on the lid. It may be overkill, but I'm willing to do it. The picture isn't great, but imagine a lot of goo on the sides and lid.

7) Now to set up the bin. I cut my egg flats in half and cut 1/3 off the plastic plates. The critters can't climb the plates to get food/water otherwise. I lined up the 8 egg flat halves so like sides touch, leaving space for waste to fall to the bottom. I then put the 2 plates in on the other side with food and water. Thus, the bin is ready!


 These are my 4 bins ready for roaches. I labeled the lids so I'll know what's what. And then, the roaches arrive! Pictures of roaches are at the top remember.


9) I set the bins up underneath my bed (used to be a closet). I used K'nex (toy) to leave space for now. The bins are very light. In these pictures the heat lamps aren't set up yet. The purple bin in the center will be for African Soft Furred Rats. Greenie is currently sitting on it for some reason?


That's all folks. Well at least until tomorrow when the Blueys wake up to sample the wares. No escapes as of now! I think I've added enough safeguards to ensure no escapes, especially considering only the hissers can even climb.
Any questions, comments or concerns?